Pillar candles are among the most elegant candles as well as one of the easiest to make. With a few simple tools and basic know-how, you can make stunning pillars to light up any room, event, or special occasion.
Types of Pillars
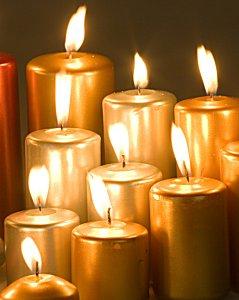
Pillars are defined as large, free-standing candles that do not require a special base or container in which to burn. (Note: All candles should be burned safely on heat-resistant surfaces.) Large is a relative term, but generally speaking pillars are thick candles, often up to eight or more inches high. Round and square columns are the most common shapes, but other popular pillar designs include pyramids, stars, ovals, spheres, beehives, crosses, or scalloped shapes. Specialty molds may even include embossed designs or uniquely shaped crowns.
Basic Pillar Candle Making
Before beginning any candle making project, be sure you have the appropriate materials on hand and understand the procedures. Always use the proper safety equipment, including hot pads and other heat-resistant materials to prevent accidental burns.
Materials
Materials needed for making a pillar:
- Mold: Available in basic shapes or multi-piece designs, the mold should be free from residue before use. Molds are available in sheet metal, aluminum, plastic, and silicone varieties.
- Wax: Choose the variety of wax you are most comfortable using. Wax can be either colorless, white, or pre-tinted.
- Add-Ins: Color chips, fragrances, etc. can be added to pillars if desired.
- Wick: The wick should be approximately two inches longer than the pillar; it will be trimmed during the process.
- Sealers: A wick screw and mold sealer or tape are needed to seal the mold so wax does not leak out while the candle is poured.
- Wick Rod: A wooden dowel, pencil, or similar object is needed to hold wick suspended in place.
- Double Boiler.
Steps
Read all steps thoroughly before beginning to make pillar candles.
- Thread wick through desired mold and secure to wick rod.
- Seal mold with screw and sealer or tape to prevent leakage.
- Melt the desired amount of wax in the double boiler. To prevent wax from burning or scorching, do not melt directly over heat. Wax should reach 175-190 degrees Fahrenheit.
- Add fragrance or dyes to wax if desired. Stir thoroughly for a consistent result, or stir sporadically for uneven tones and texture.
- Pour wax into mold to within one-half to one inch of the top of the mold. The mold should be perfectly dry before pouring wax. Excess water will damage the candle and prevent it from setting properly.
- As the wax cools, it will depress slightly in the center of the candle. Use a thin rod to poke ventilation holes in the wax. Once this depression forms, this will prevent the candle from deforming in the mold. Ventilation holes should be made to within one inch of the candle's full length.
- Add additional wax to fill ventilation holes and depression. This wax should be 5-10 degrees hotter than the initial pour to promote binding without obvious seams. This second pouring should be level with the initial height of the candle or there will be a seam along the base.
- Let candle cool completely. For thick pillars, this may take 24 hours or longer.
- Remove candle from mold. If candle does not slide out easily, place in refrigerator for 15-20 minutes first.
- Trim wick on base flush with wax. The wick on top should be one-quarter to one-half inch long.
- Smooth base by trimming or controlled heating if necessary and gently buff surface with nylon cloth.
- Embellish if desired.
Embellishing Pillar Candles
A simple pillar in a bold color can be a gorgeous, dramatic statement. However, many people prefer to embellish candles for greater interest and personalization. Ideas for embellishing a homemade pillar include:
- Adding chunks to the mold before pouring the melted wax.
- Layering different colors of wax over time as initial layers cool. Tilt the mold to create angled layers.
- Adding decorative mix-ins such as beads, spices, flower petals, or glitter to the melted wax.
- Pressing pins or stud earrings into the surface of a finished candle.
- Carving words, patterns, or other decorations onto the surface of a finished candle.
- Adding accessories such as ribbon bands, beads, charms, or other trinkets around the candle.
- Creating a candle ring to display the finished pillar.
In Conclusion
There are endless ways that pillar candles can be designed and embellished to express personalities and sentiments. With a bit of creativity, a completely unique pillar makes a beautiful gift, centerpiece, or decoration.


