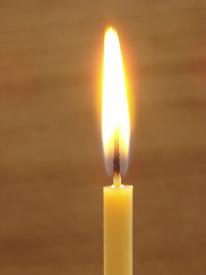
Have you ever wanted to learn how to make beeswax hand dipped candles? The process is quite simple, though you'll need to have some patience to end up with a nicely-sized candle.
Using Beeswax for Dipped Candles
Beeswax is an excellent choice for dipped candles for a number of reasons, including:
- Beeswax is thicker than paraffin or soy, so you won't need as many dips for the finished candles
- It gives off a naturally sweet smell so you don't need to add scent
- It's widely available in a number of formats, including chunks, pellets, and sheets
- Beeswax tends to burn a little more slowly than other types of wax, so your candles will last longer
Beeswax can be more expensive than paraffin wax, but the benefits of using this natural base for your candles can be worth the added cost.
How to Make Beeswax Hand Dipped Candles
The most common type of dipped candles you'll find are tapers, because of their long, slim shape. Hand dipping allows you to customize how tall and wide the finished candles will be, and this is a great advantage if you have unusually shaped candle holders to fill.
Make sure you choose candle wicks that are suitable for beeswax candles. Square braided wicks are best for this purpose, as they will allow the candles to burn evenly without extinguishing themselves.
Here's how to make beeswax hand dipped candles from the comfort of your own kitchen.
Materials Needed:
- Large pot to use as the bottom half of a double boiler
- Tall, clean tin can to melt and hold wax
- Beeswax chunks or pellets, enough to fill the tin can when melted
- A roll of candle wicking
- Wooden spoon, chopstick, pencil, or other thin rod
- Strong dowel or broomstick
- Sharp knife
- Old newspapers or a drop cloth
Instructions:
- Fill the pot about halfway with water. Place the beeswax in the tin can, and place the can in the water. Start melting the wax by placing the filled pot on a burner set to medium-high heat.
- As the wax is melting, set up the dowel or broomstick so that you can hand the dipped candles over it to dry. You can hang it between two chairs, for example. Place the newspapers or drop cloth under the dowel to catch any drips.
- Cut the candle wicks into uniform lengths. They should measure twice the height of your tin can, plus a few extra inches.
- When the wax has melted completely, hang one length of wicking over the wooden spoon, leaving the ends hanging straight down. Dip both ends into the melted wax, and wait a few seconds to allow the wax to soak into the wick.
- With a straight, fluid motion, pull the candles out of the wax. Dip them again, this time without waiting to pull them back out. Set the candles over the dowel to set slightly.
- Repeat this process with the rest of your cut wicks.
- Going back to the first set of candles you dipped, dip them again and return them to the dowel. Continue this process until all of the candles are the right width for your purposes.
- Allow the candles to set for several hours before cutting and trimming the wicks.
Candle Dipping Tips
Here are a few things to keep in mind when making dipped beeswax candles.
- As your candles set on the dowel, wax will drip from the bottoms. Trim off the drips that have set on the bottom of the candles from time to time to ensure they fit completely into your dipping can.
- If your candles start to bend or look warped, roll them on the countertop while still warm but mostly set to straighten them before the next dip.
- Don't let the candles sit in the melted wax too long as this will melt the beeswax already on the wick.
Enjoy Your Hand Dipped Candles
Hand dipped candles can be used as décor on a dinner table or buffet, or added to a more intricate candle centerpiece. They also make thoughtful gifts when paired with pretty candle holders. Once you start making your own dipped beeswax candles, you'll find many more uses for them in your home.


